How to Scratch Build Forgeworld models
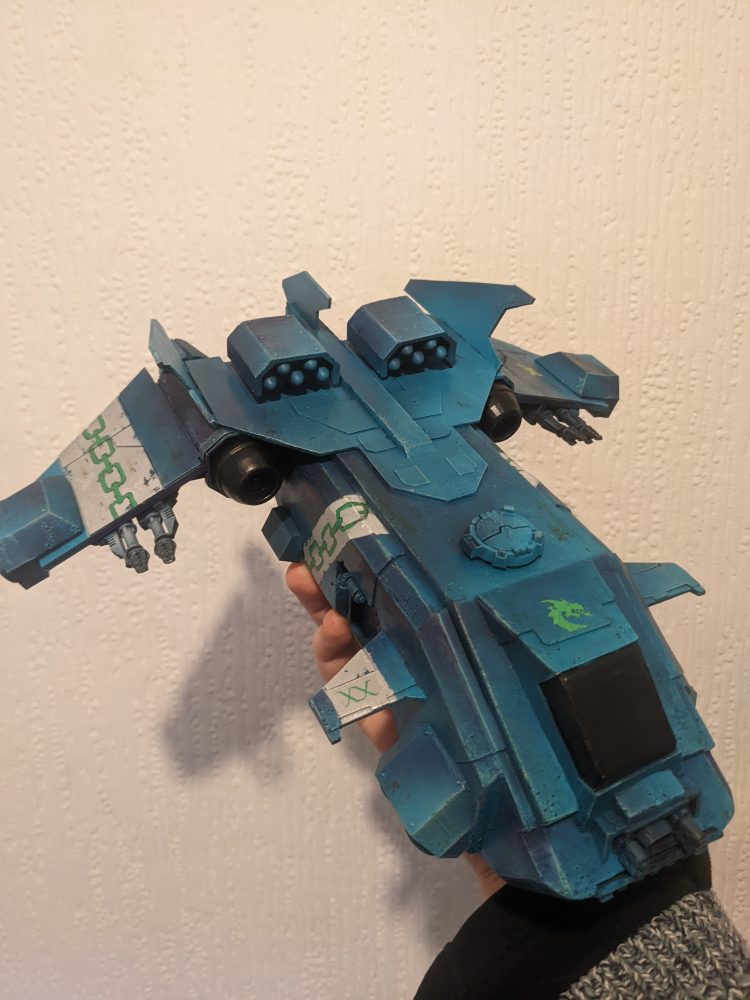
I recently discussed my Alpha Legion army, one of the centre pieces of the army is a scratch build mini based on the storm eagle gunship model from Forgeworld. I wanted to discuss the thought process and techniques.
Why Scratch build?
There are many reasons you may want to scratch build a mini, especially a large mini like the Storm Eagle. The most obvious reason and the one that most people will cite is cost, the Storm Eagle costs £137.00 on the forge world site.
Now by Forge World standards that is pretty reasonably priced, however for most hobbyists that's just a tad too steep. And, while some would argue investing their time (especially if you billed yourself hourly) for such a project would cost you far more, even at a conservative rate. Some people (myself included) have more time than money and value that time spent as part of the overall hobby.
Some people, like myself, are at our happiest when knee deep in foam cut offs and plasticard working away the hours on huge projects.
Forgeworld Minis are also made of resin, and are notorious for being warped and/or miscast straight from the manufacturer that requires hours of submerging the mini in near boiling water and un-bending to make parts fit correctly.
How to get started with your scratch build
So when your scratch building a project, its a good idea to have a clear vision of what you want to build. Even if you're building something entirley new.
Plan ahead!
It's always tempting to go in head first, guns blazing, and sometimes, your bitz box speaks to you and thats okay, but when your trying to build something massive from scratch, like a Forgeworld kit it helps to have some idea what you want.
If it is an entirely imaginary thing you're trying to build, or something with no visual reference material in the lore, you might want to sketch it out first, even if you can't draw, getting the ideas down on paper will help you understand its structure. Try to cover several angles too. It doesn't matter if you change your mind later, its the process.
If you're trying to copy an existing product you might want to see if you can find parts with known measurements that you can use as a reference to get the correct scale.
For instance when building the Storm Eagle I used the doors on the side of the mini, knowing that they are compatible with the Rhino doors forge world sells for each legion. This gave me a reference for scale, and allowed me to roughly sketch out at 1:1 blue print using the images from the forge world site as a reference, which handily provided a 360 degree rotating image of the full model.
Keep it simple
Start with basic shapes. If its a space marine vehicle that makes it easy, they are generally, at their core, simple geometric shapes. If you're planning on building an Eldar vehicle or a bio titan your going to have to get a bit more technical. Either way start with the core shapes.

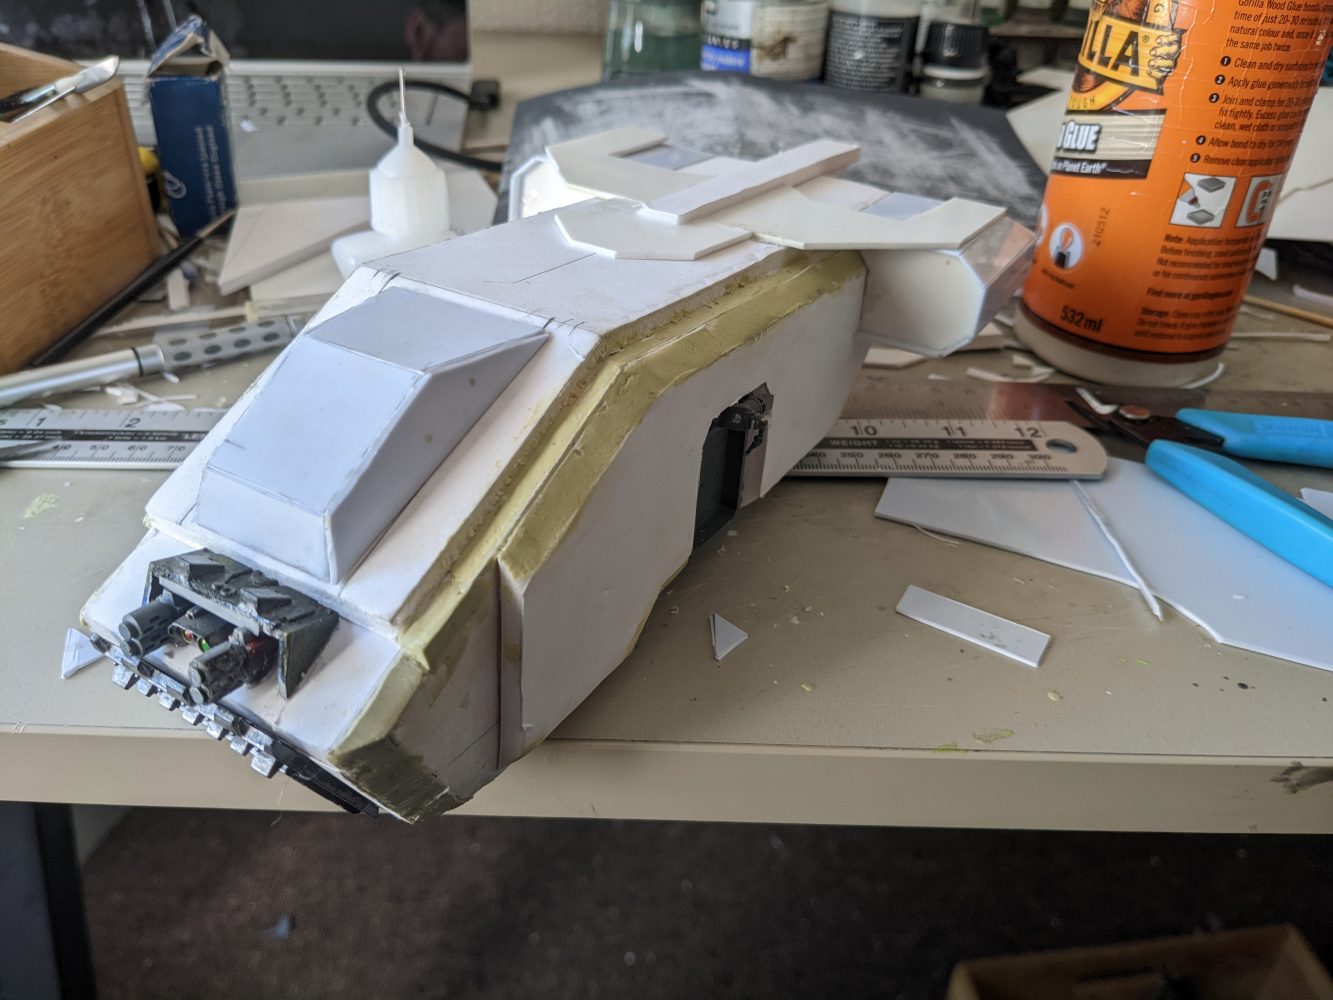
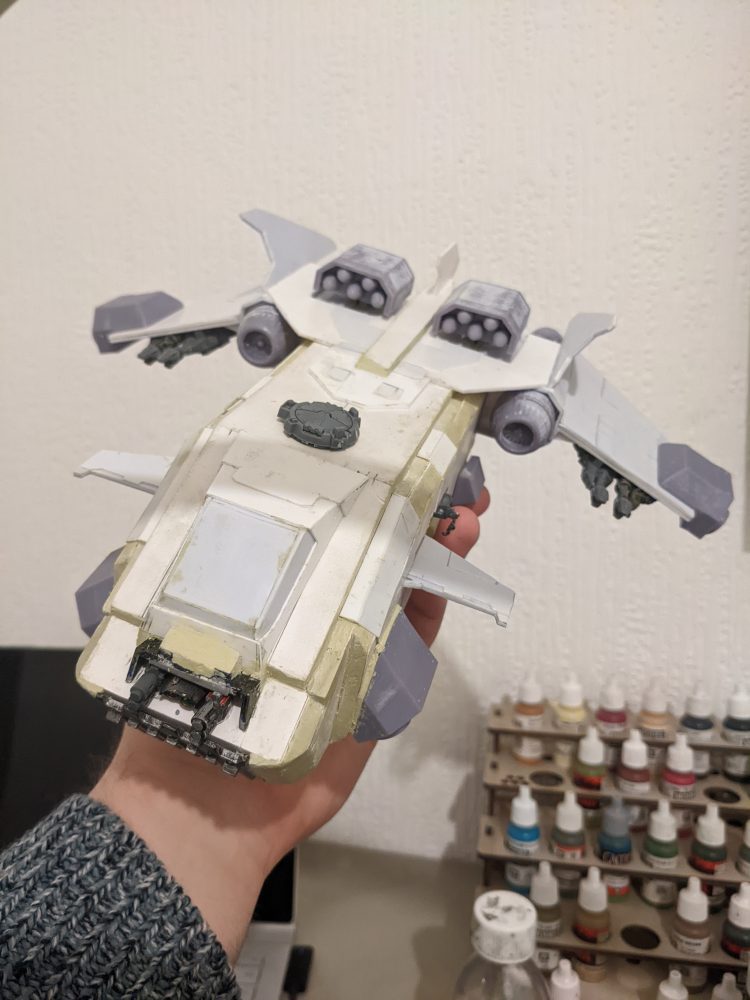
With the Storm Eagle this was fairly simple, it basically amounted to a box with a wedge at the front. Foam card worked fine as the base for me but you could easily use plasticard or even thick card in a pinch. I had limited supplies of plasticard available otherwise that would be my go to material.
If you were building something organic like a biotitan I would start with a wire armature, build out the bulk of the body with aluminium foil. I'd then begin to build up the body and limbs with simple forms and then cover it with with air drying clay or milliput before progressive layers of detailing with green stuff.
What Materials?
Your going to need to decide what to build the mini out of pretty early on.
ABS Plasticard
A great resource is ABS Plasticard, it can be glued just like plastic games workshop kits and its incredibly resilient. It's available in plenty of different thicknesses. You can score plasticard then snap it along the line and it will, most of the time, result in a clean "cut". It can been tricky to work with at the higher thicknesses, getting it to snap takes some effort.
Plasticard can also be bought in tubes, rods and even "I" beams, great for pipework and structural elements.
However, it can be expensive when you need bulk quantities for large kits. I would suggest keeping plasticard for paneling and detailed structures of the mini. Use something cheaper and easier to work with like Foam Board or XPS foam for the structure.
Foam Board
Foam Board is cheap, fairly resilient and easy to work with. However, it won't look very convincing as the external surface of your model. You can use it to build the bulk of the mini however, to save time and money. Then dress it up using other materials like Plasticard and Greeblies.
It's biggest downside are its edges. Being foam sandwiched between Paper once you cut it open you can see the foam. You will need to spend time later dressing and covering these if left exposed.
Plasticard can be assembled using a hot glue gun for super quick assembly and prototyping.
Cardboard
While using Cardboard is possible, and has many of the same properties as foam board. Its cheap, its easy to work with. Card is not going to be durable long term and its finish isn't going to be very appealing unless heavily dressed up. It also won't be very rigid without plenty of reinforcement. I would avoid using it for the actual build, however may have some use as templates and/or prototyping.
XPS Foam
XPS Foam might be a great, light weight and sturdy alternative to foam board for constructing the basic forms of the model. You can easily carve it into complex shapes and curves and can be fairly resilient when finished off properly.
Its main downsides are its finish. Foam is just pockets of air inside a plastic, so will have a very rough uneven surface. However you can cover this up with car body work filler and sand it smooth.
Greeblies and Bitz
Greeblies are bits and spare parts from other mini kits or interesting household junk that will help break up a boring surfaces or proxy for machinery. Vehicle kits are an obvious place to start when building something like a tank. However any interesting little bits can work if put together in interesting ways.
When collecting parts together however, its often worth considering their origin. Those Necron legs might look like awesome spider legs, but will they look out of place on an Mechanicum Walker because they have some very Necron aesthetic and design language that may be hard to disguise. Imperial parts are easier to come by. You have the whole of human history to pull from, including WW2 battleship and tank kits.
Try collect bits for your own subfaction where possible. Anything you don't have to entirely scratch build yourself, is time saved and will help sell the end result as authentic. For instance, Adeptus Astartes vehicles have a different aesthetic to Imperial Guard, despite both being Imperium.
Green Stuff and Milliput
While all of the above work for hard body models, like a tank, aircraft or structure, they won't be any use for organic elements, like Tyranid Biotitans or fleshy bits on Chaos Deamon Engines. For those elements your going to need to result to Green stuff or similar putties that can be sculpted. They can also be used to fill in minor gaps. Milliput also has the advantage of being sand-able once set, so is great for filling panel gaps you don't want.
3D Printer
For those with the skill or the capacity to learn said skills, a 3D Printer can massively improve the quality of a mini, or be great to make those hard to find parts you can't easily build, scrounge or buy.
While some might be inclined to try print the entire model, especially if theres a fan built file freely available. We are going to use it to augment our scratch builds.
3D printers can be great for those hard to find, difficult to sculpt by hand objects. For example, the jet engine thrusters on my storm eagle gunship would be a real pain to make the individual fan blades and cowling. So I figured out how to use Blender (a free 3D modelling software) and transferred the file across to my 3D printer and it was done a few hours later.
Resin 3D printers are pretty reasonably priced and, while we're trying to save money by scratch building minis, can offer plenty of utility for future builds like terrain, bits, greeblies or even entire minis at a very respectable quality.
So why scratch build a forgeworld mini?
In summary, scratch building a forgeworld mini is often a cheaper, more fulfilling and rewarding way to get an otherwise expensive and unobtainable mini onto the table. Provided you have the free time and resources. And while the final result depends on the skills of the builder. There are people with far more patience and skill than me. When a methodical and careful approach is taken to its construction, can simplify the process and the result can be pretty damned close to the original.
So why not try to scratch build your own forgeworld mini?